A GUIDE FOR STUDENTS TO APPLY ONLINE FOR ADMISSION AND REGISTRATION
By the Office of the Registrar
STEPS
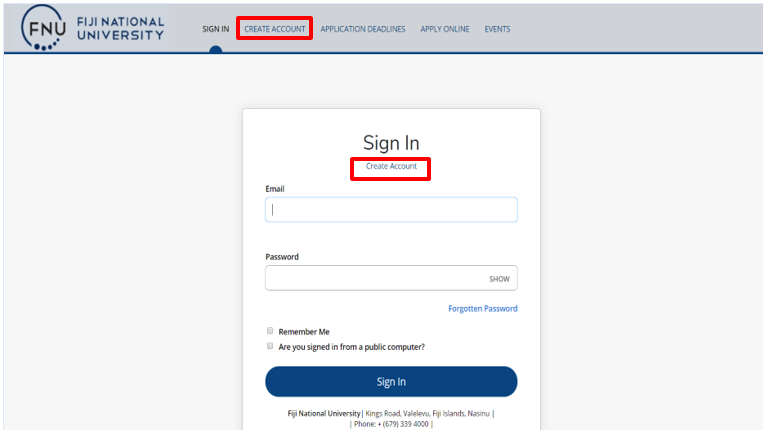
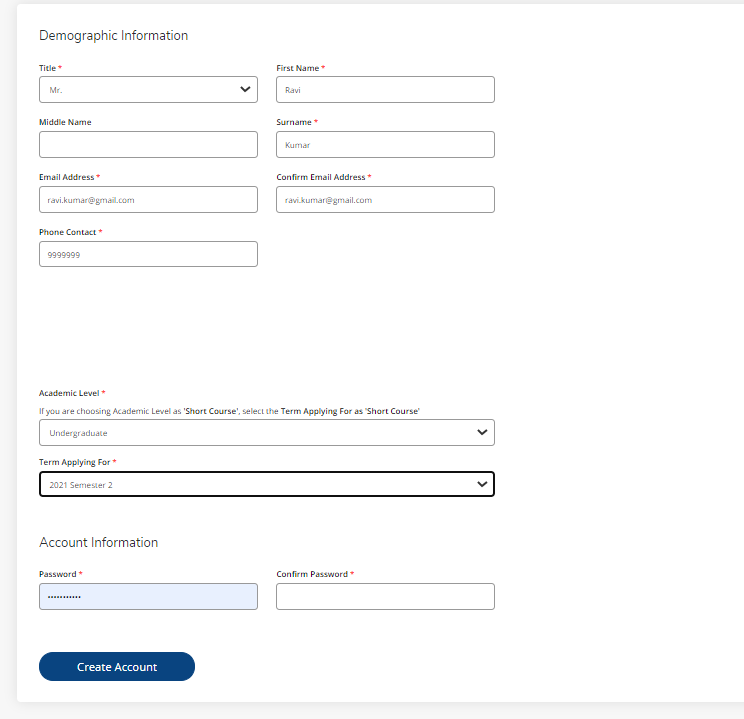
1.1. Create Account
In this step, student needs to create an account by filling important information such as personal details, email address, phone contact, date of birth, gender and address.
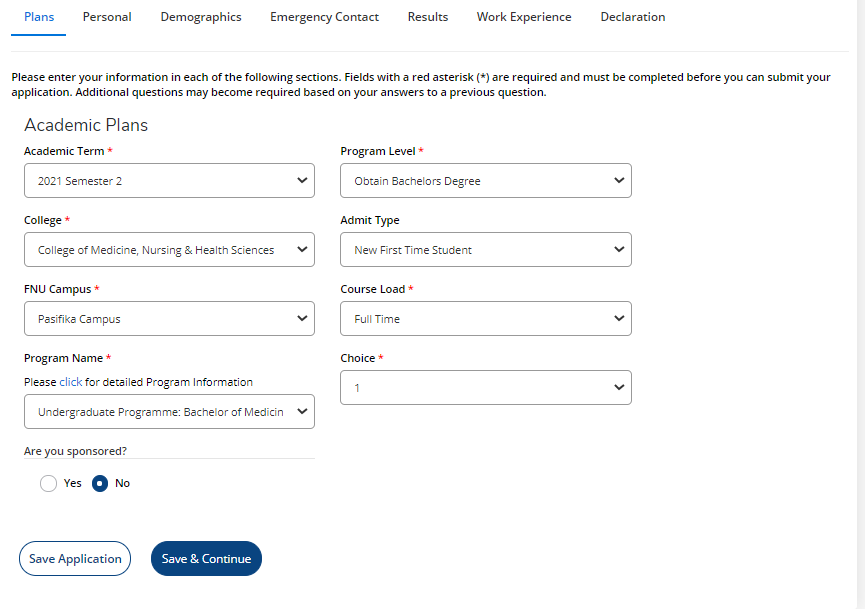
1.2. Create Application. Start with the Plans tab. The Plans tab consists of your study plans.
1.3. Personal Details

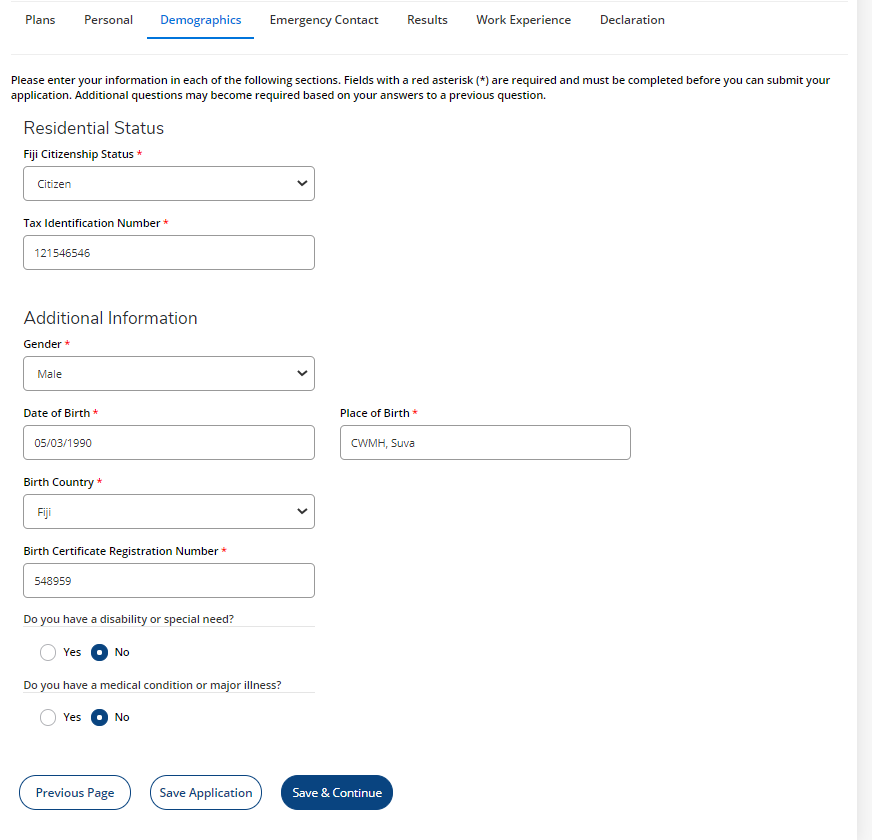
1.4. Demographics
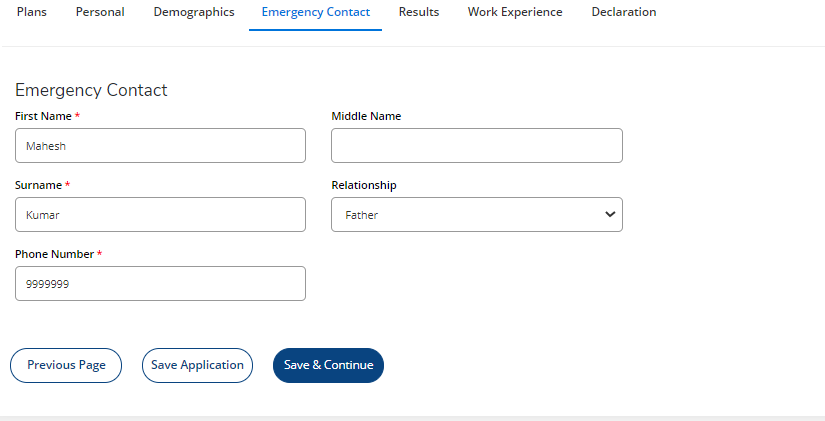
1.5. Emergency Contact
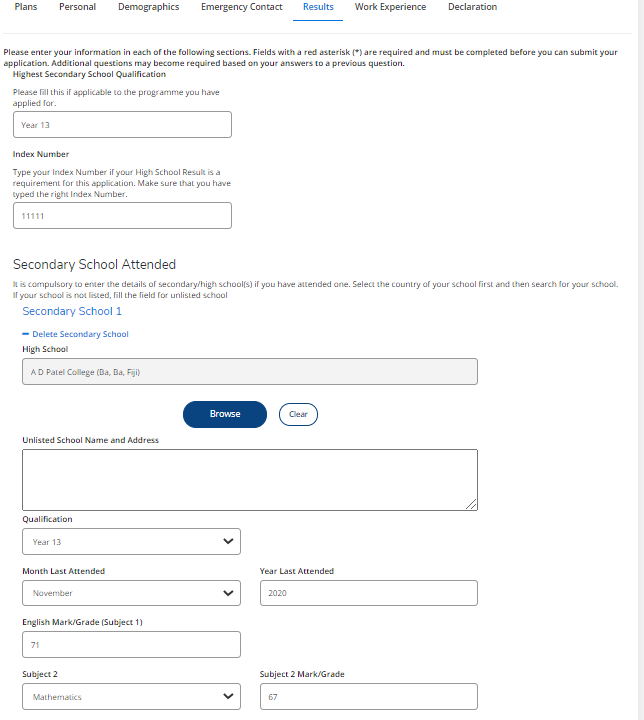
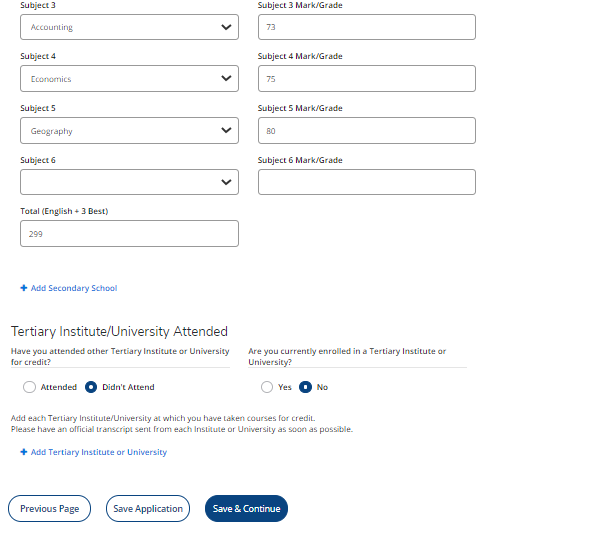
1.6. Results
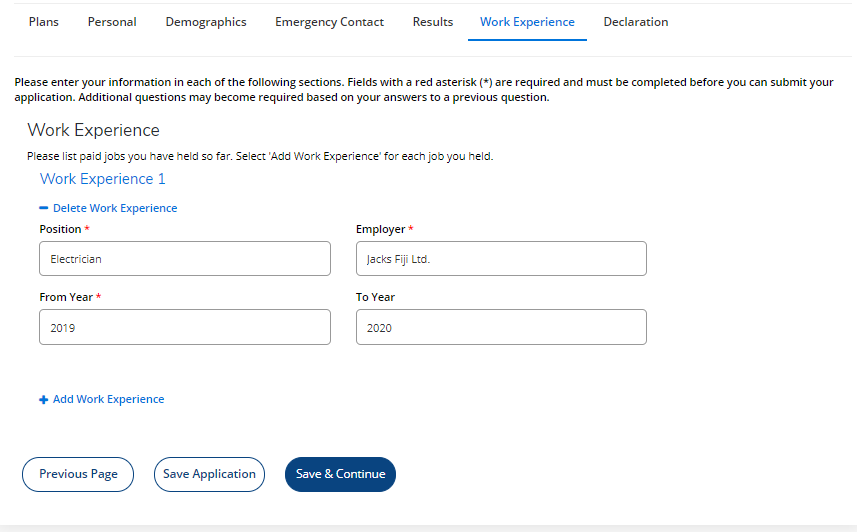
1.7. Work Experience
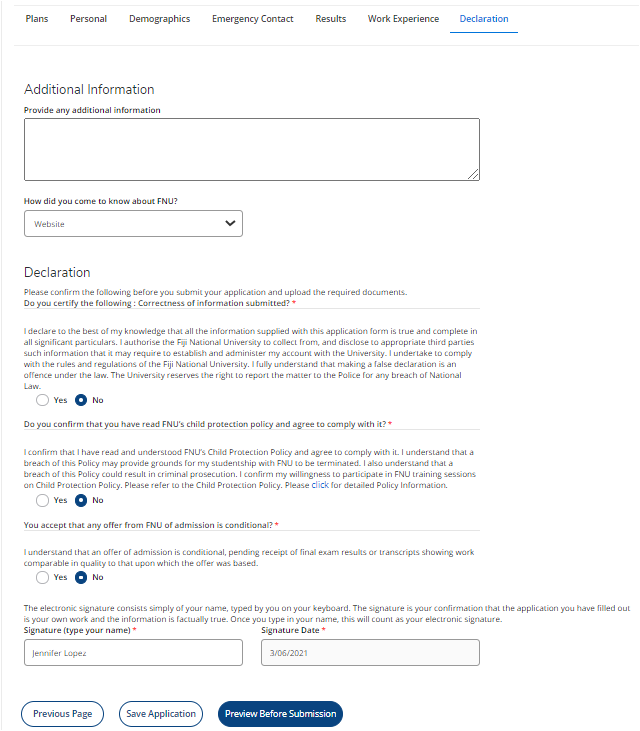
1.8. Declaration
1.9. View your Account
The last step will lead you to your Account. On your account click on View under Action for the Application created to upload documents.

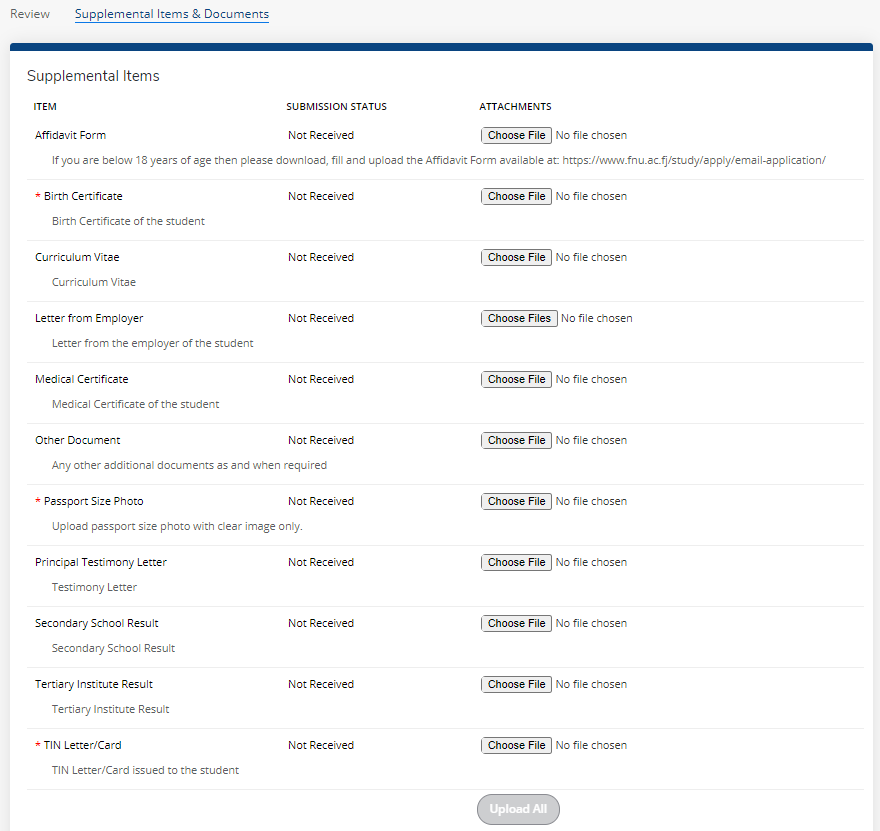
1.10. Upload Supplemental Documents
1.11. View Application Status
To view status of application, go to ‘My Account’. The different possible statuses that you may see for your application are:
Started – This is when you have started your application but have not submitted it.
Action Required – This is when you have created your application and submitted it but you did not upload the required documents.
Submitted – This is when both your application and documents have been submitted.
Completed – This is when your application has been verified by FNU and has been marked complete for processing.
Accepted – This is when your application has been accepted by FNU and an offer letter is also sent to you on your email.
Denied – This is when your application has been rejected is marked as unsuccessful.
If the status shows ‘Accepted’ then please check your email for an offer letter immediately and reply by accepting the offer from your end also within 3 days. For further enquiries email on admissions@fnu.ac.fj

2 Registration through Student Self Service
2.1 Open Student Self Service link https://self-service.fnu.ac.fj/StudentSelfService/
For new students, this link will be provided in the Registration Information Letter.
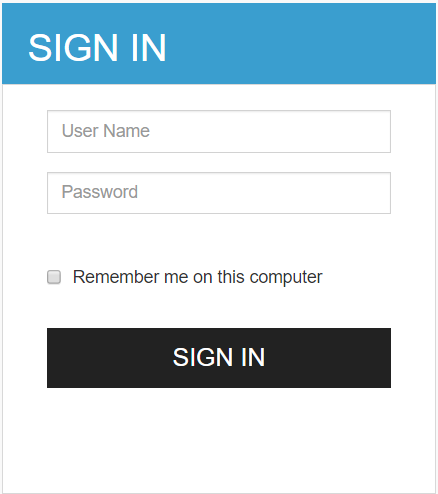
2.2 Enter student User Name and Password to sign in.
2.3 Click on Banner Menu icon
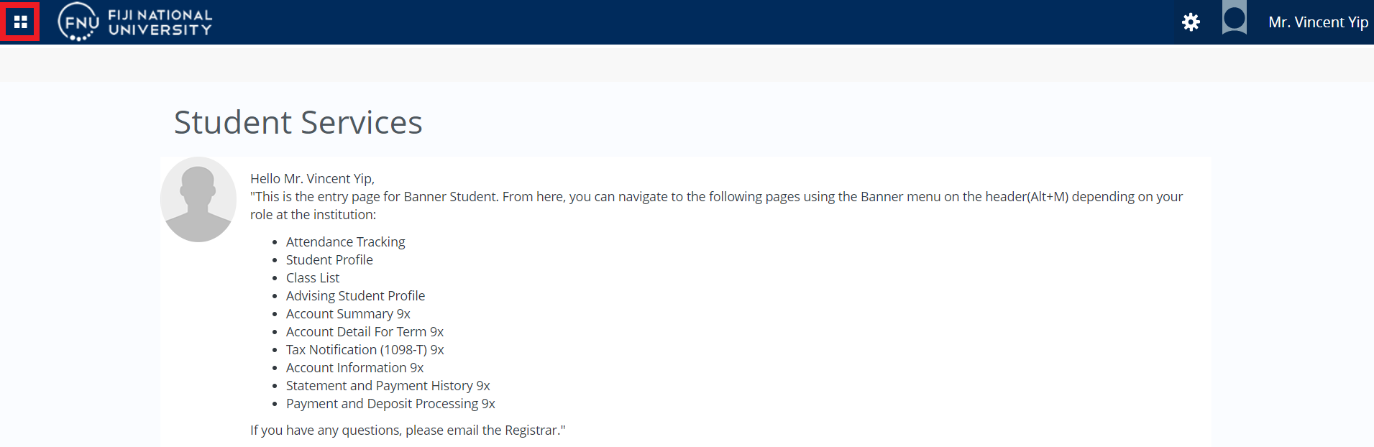
2.3.1 Click Banner → Student → Registration → Banner Registration

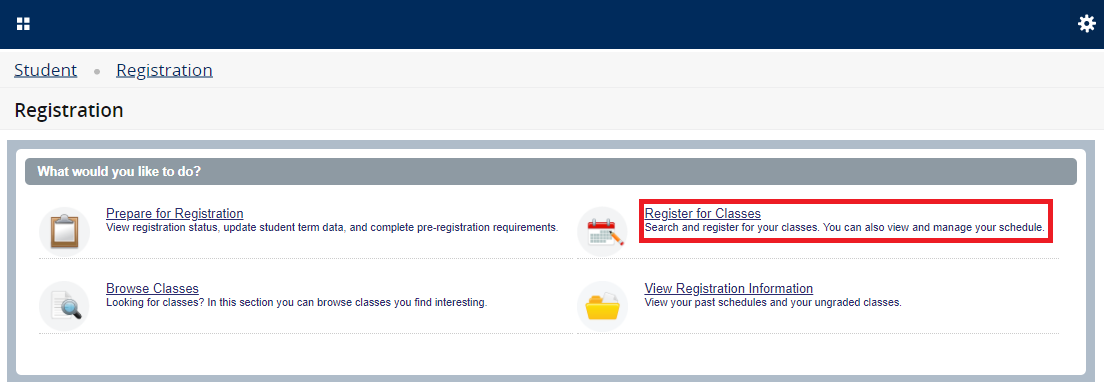
2.4 Select Register for Classes.
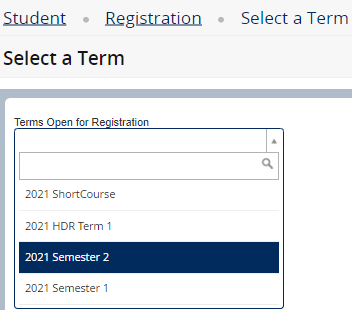
2.5 Select the Term from the drop down menu.
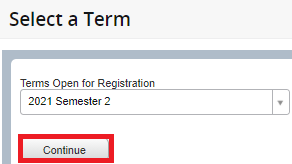
2.6 Click Continue.
2.7 Search for the Subject, Course Number that you plan to register in and click Search.
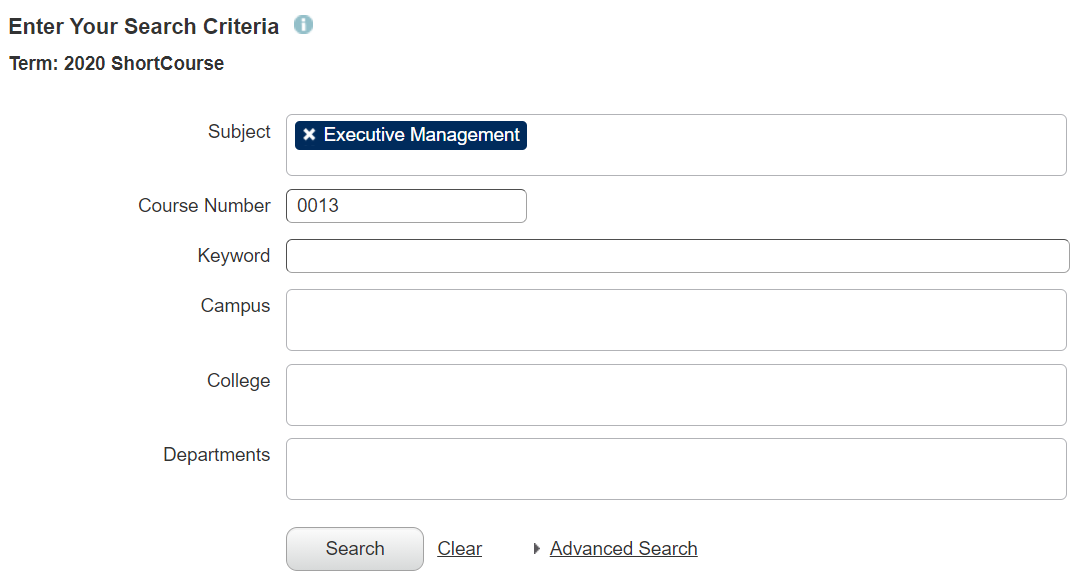
This will display a list of all courses. For NTPC Open learning Courses, it will display a CRN each for a Course while for Other Colleges, all the components for a Course will be linked as one.
2.7.1 Open Learning
2.7.1.1 This will display a list of all courses selected in the Subject area above. Select the appropriate CRN/Course Number and click Add.

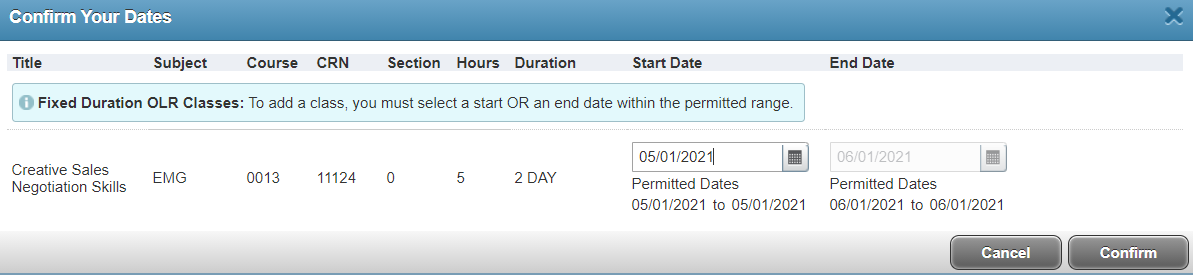
2.7.1.2 The following dialogue box will appear with Start Date and End Date. Enter the dates as per the permitted dates (select start date) and click Confirm.
2.7.2 College
2.7.2.1 Select the appropriate CRN/Course Number and click View Linked to see linked CRNs.

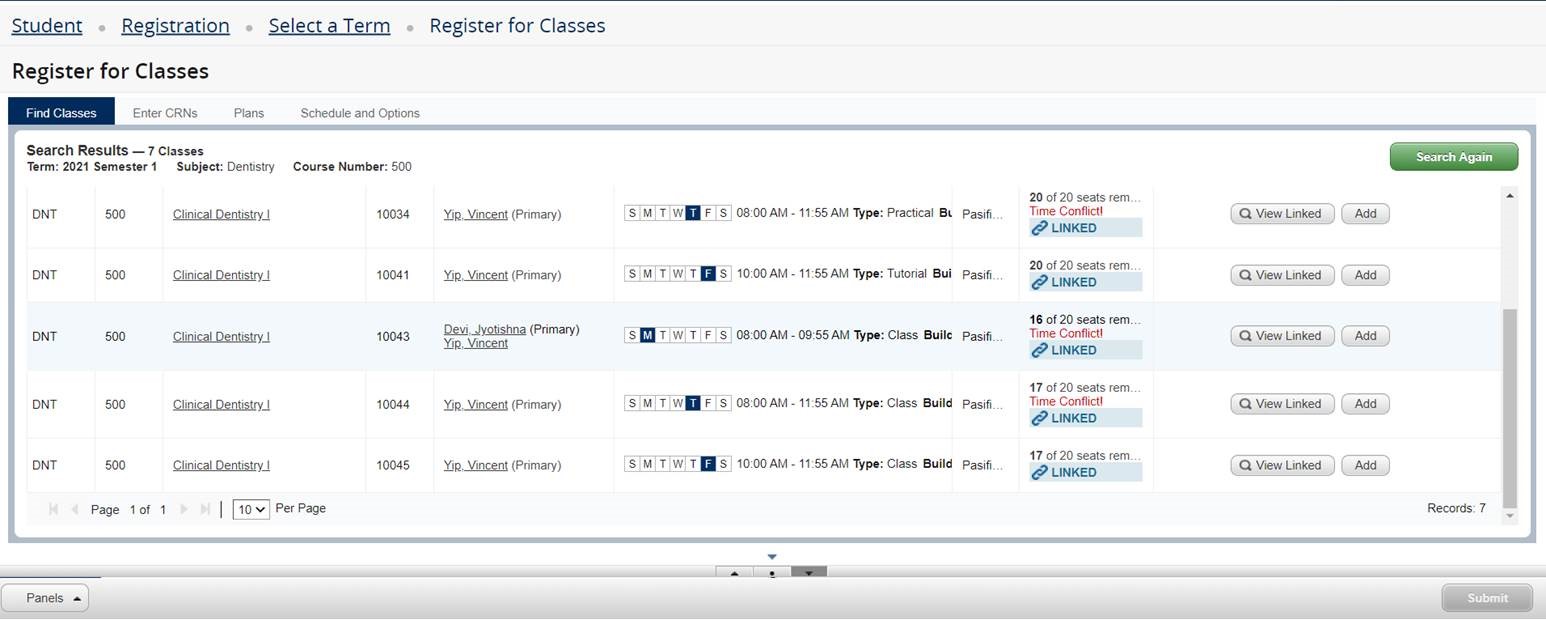
Do not select an option that has time conflict.
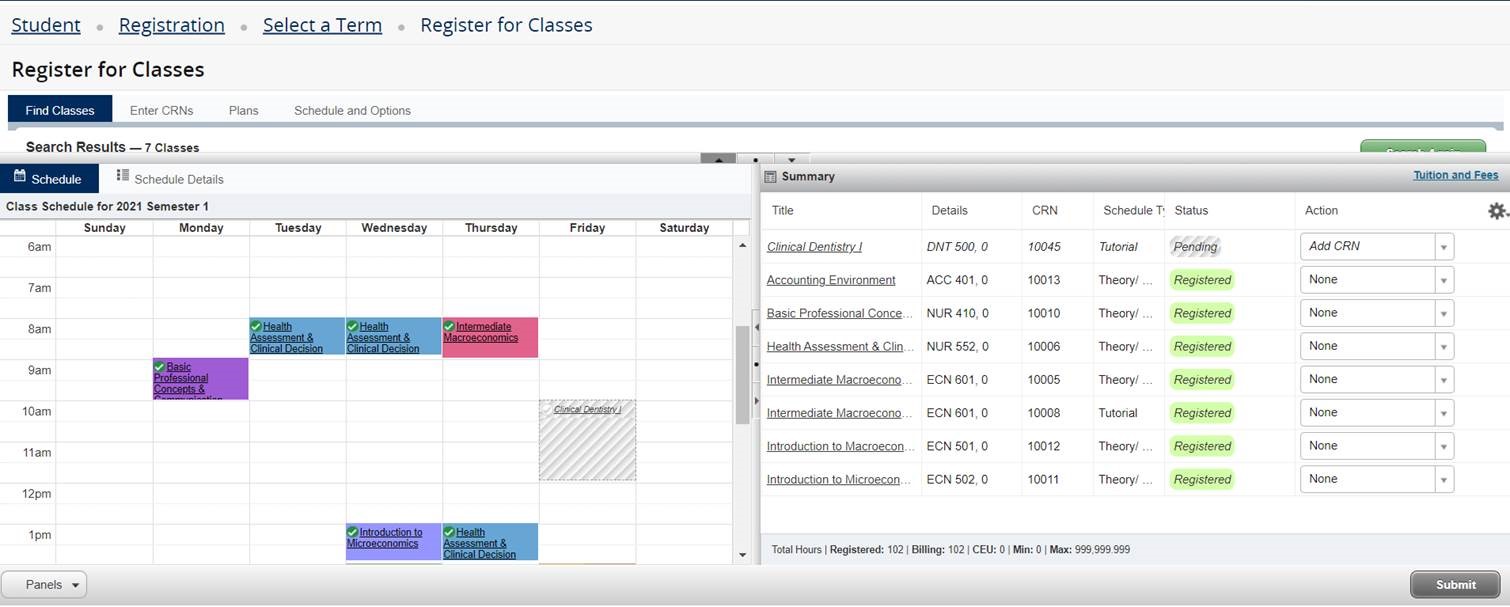
2.7.2.2 Click Add All for the linked courses that you wish to take. The selected course will be added in the Summary section with Pending
2.7.2.3 Click on Submit so that the course status can change from Pending to Registered.

All the linked Courses will appear in the Summary.
2.8 The schedule for the week will be shown under the Schedule
3 Self Service Drop Course
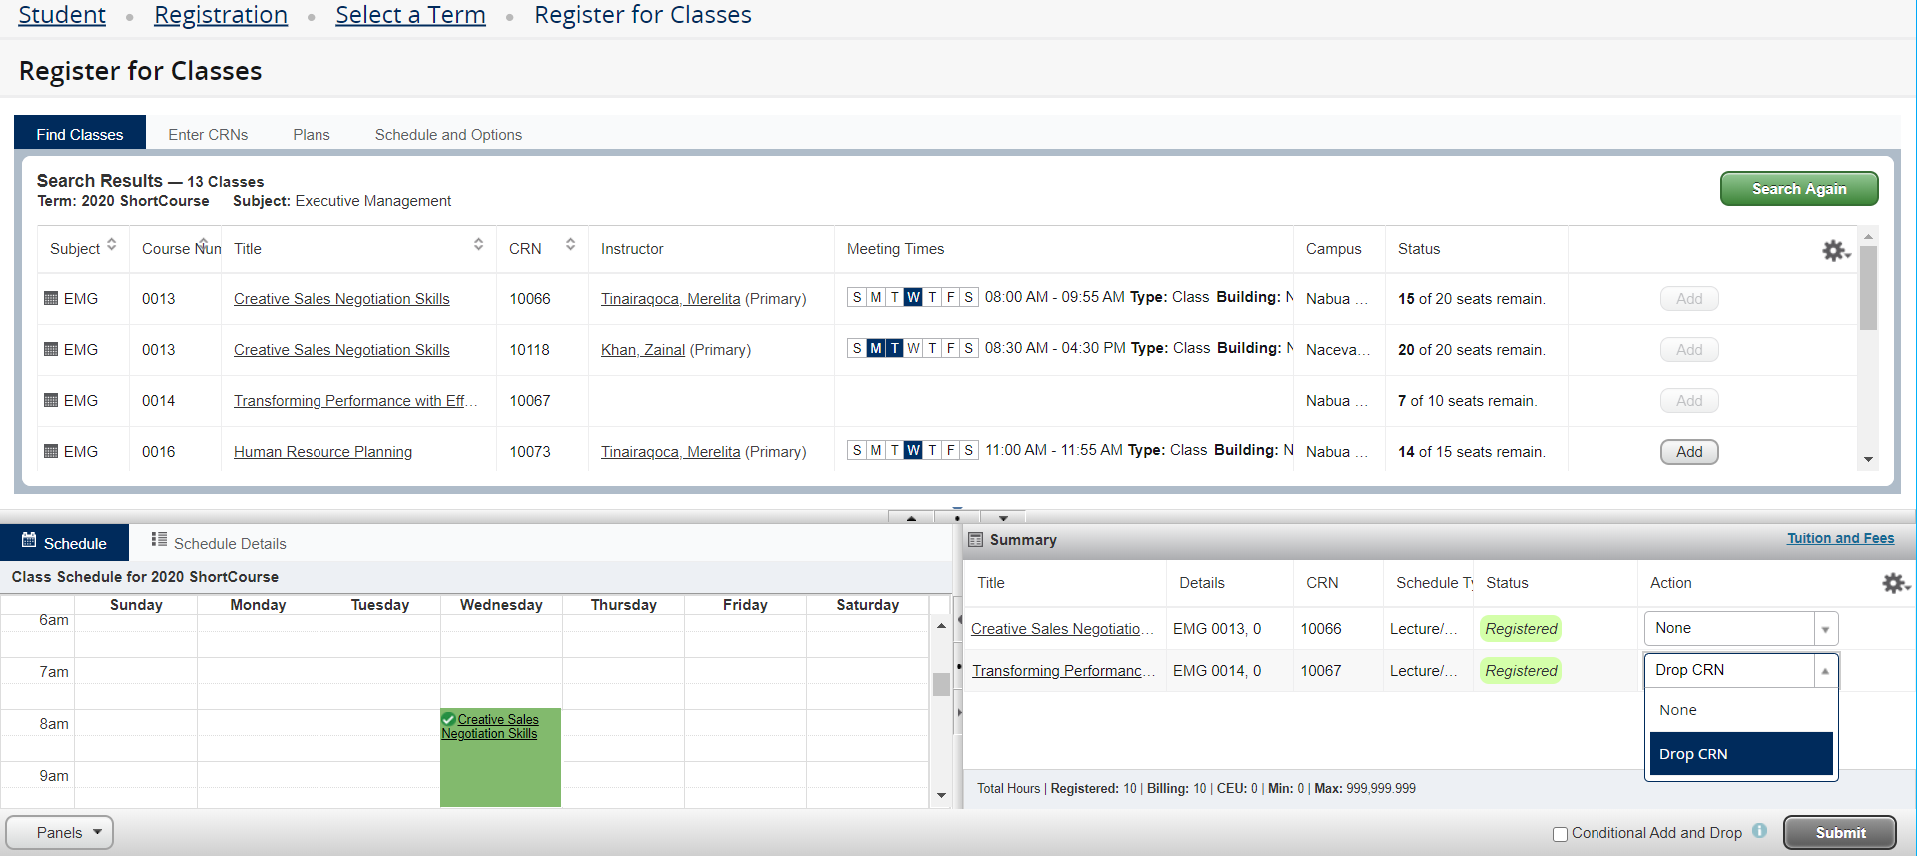
To drop courses, click on the available Action list, choose Drop CRN and click Submit.

The “DROP” option will not be available after the course commences. For dropping courses, contact the Academic Office or email to admission@fnu.ac.fj or Training Centers for NTPC.
THE END